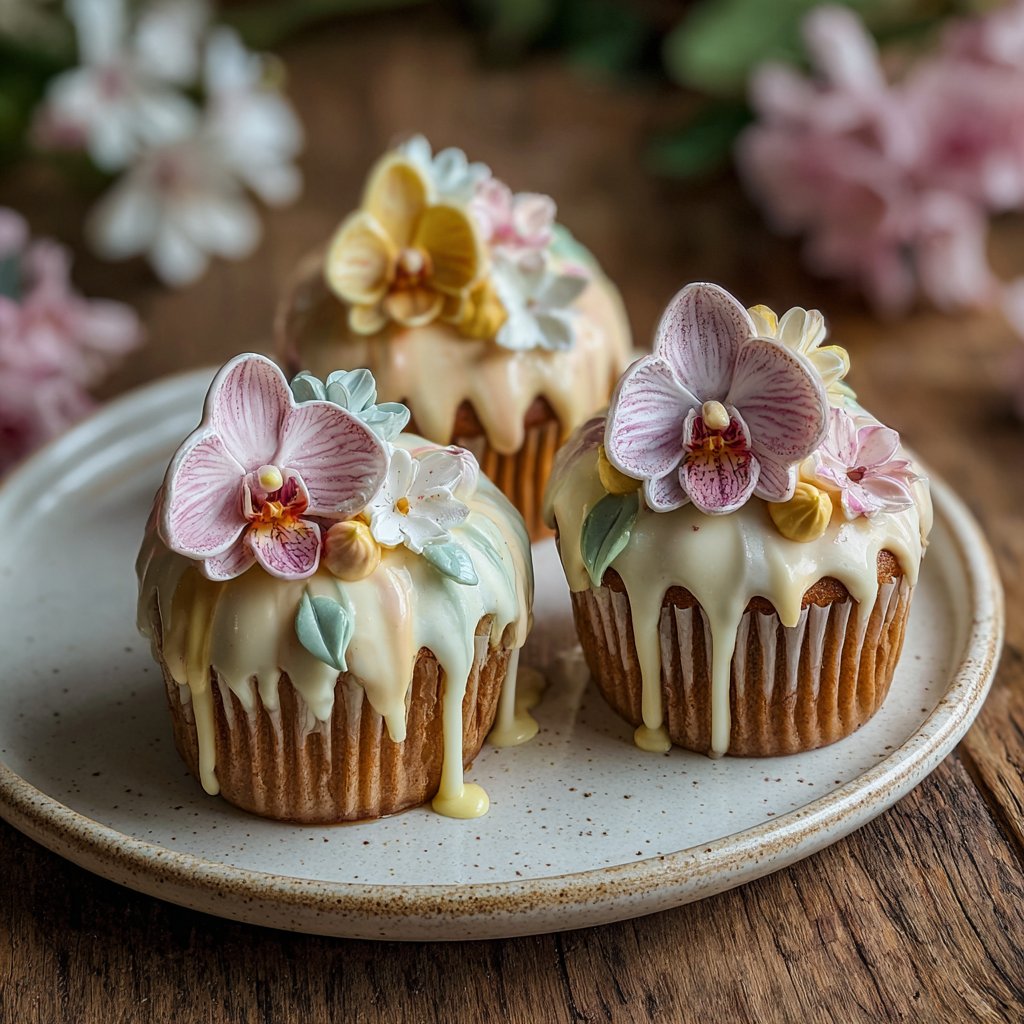
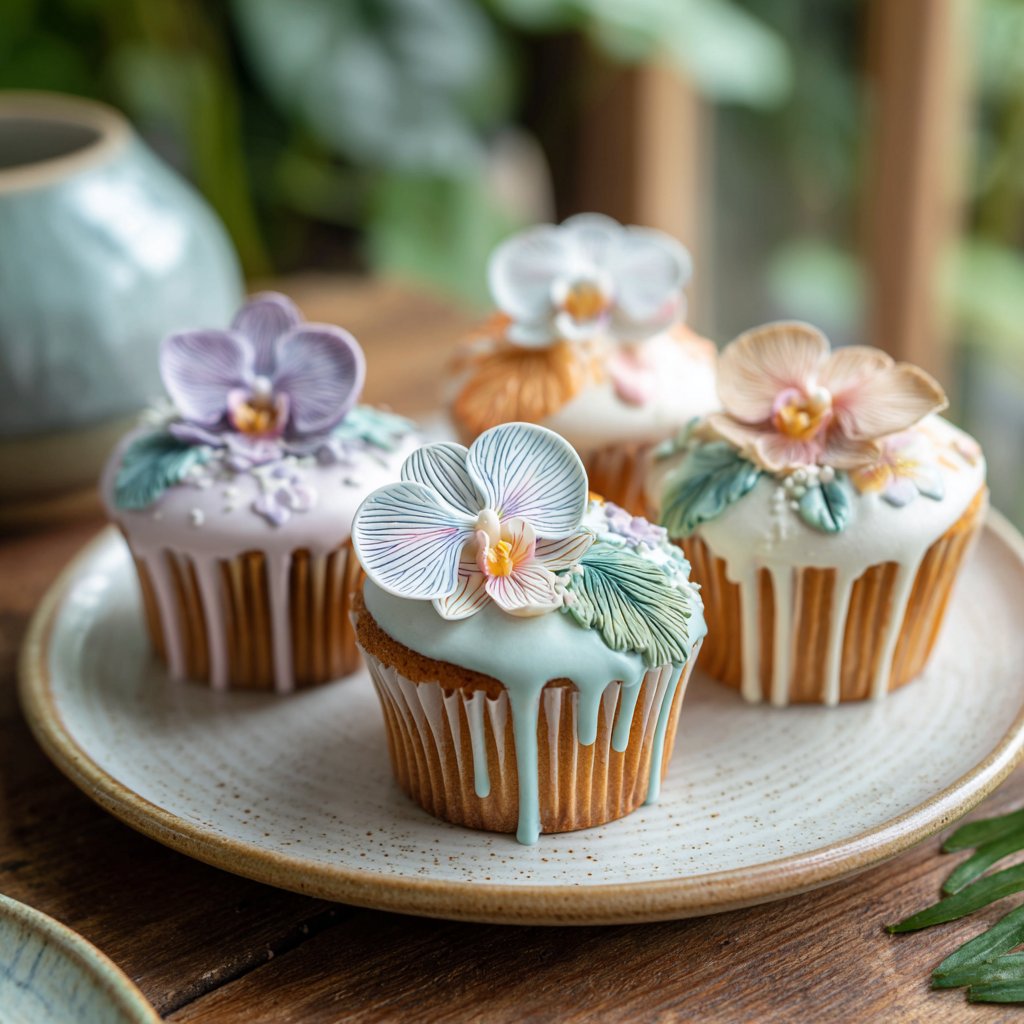
Delicate Orchids Cupcake Decorations
Highlighted under: Kids Baking | Easy Sweets
When I first attempted making delicate orchids for cupcake decorations, I was amazed by how such intricate beauty could emerge from simple fondant. It was a fun challenge that allowed my creativity to flourish, and as I molded each petal, I felt more like an artist than a baker. The subtle colors and elegant shapes truly captivated me, turning ordinary cupcakes into spectacular desserts. I can’t wait to share this process with you—it’s sure to impress at any gathering and evoke a sense of accomplishment while decorating!
Making these delicate orchids was an exciting journey for me. I experimented with various colors and learned the importance of letting the fondant rest before molding. This step really helped the petals hold their shape and provided a more realistic finish. Each batch turned out slightly different, which added to the charm and uniqueness of each cupcake.
One specific tip I discovered is to use a small ball tool to refine the edges of the petals. This technique not only enhances the petal's natural flow but also creates depth in the decoration. Trust me, it makes all the difference!
You'll Love These Cupcake Decorations Because:
- They add an elegant touch to any dessert.
- The vibrant colors bring life to your cupcakes.
- Creating them is a delightful and creative experience.
Mastering Fondant Consistency
Achieving the right consistency in fondant is crucial to create beautiful orchid decorations. When kneading the fondant with tylose powder, ensure it becomes smooth and pliable. If it's too dry or crumbly, add a few drops of water gradually, avoiding a sticky mess. Conversely, if it’s too wet, dust with a small amount of cornstarch until the desired texture is reached. This balance is essential for forming defined petals and shapes.
When incorporating food coloring, a little goes a long way. Start with a small amount and knead thoroughly, adding more as needed. It’s important to maintain the fondant's pliability; too much color can alter its textures. The colors should be vibrant yet soft, perfectly measuring to create an eye-catching effect that mimics real orchids. Always wear gloves to avoid staining your hands and ensure clean color application.
Creating Realistic Petals
Shaping the petals properly will significantly affect the realism of your orchids. When using a ball tool to flatten one end of each teardrop, be gentle; this ensures the edges remain thinner, giving a delicate effect. The symmetry of the petals is crucial as well; aim for uniformity in size to maintain a visually appealing flower. Practice makes perfect here; don’t hesitate to reshape if necessary until you achieve that elegant and natural look.
In addition to the shaping techniques, consider varying the lengths of the petals for a more organic appearance. Orchids aren’t always identical, and introducing slight differences can add to their charm. Once assembled, bend the petals slightly upwards or downwards for added dimension. This small tweak can enhance the overall presentation, as natural flowers tend to have a more relaxed and open shape when viewed from different angles.
Final Touches and Storage
The finishing touches are where your orchids can really shine. Dusting with cornstarch not only prevents sticking but also gives a subtle matte finish that beautifully contrasts the edible glitter if you choose to use it. A light application of edible glitter can elevate the visual appeal, making your cupcakes look even more stunning. Just be sure to apply it sparingly so it doesn’t overpower the delicate colors.
If you're making these decorations ahead of time, they can be stored in an airtight container at room temperature for up to a week. Avoid refrigeration, as it can cause the fondant to sweat. For longer storage, consider freezing the orchids, but be sure to keep them flat to maintain their shape. When ready to use, allow them to return to room temperature before placing them on your cupcakes, preserving their beauty.
Ingredients
Gather these ingredients before you start molding your delicate orchids!
For the Orchids
- 1 cup fondant (white)
- Food coloring (optional)
- 1 tablespoon tylose powder
- Cornstarch (for dusting)
- Edible glitter (optional)
Make sure all ingredients are at room temperature before starting!
Instructions
Follow these steps carefully to create beautiful orchid decorations.
Prepare the Fondant
Knead the fondant with tylose powder until it is smooth. If you desire color, divide the fondant and mix in food coloring to achieve the desired hue.
Shape the Petals
Pinch off small pieces of fondant, rolling them into teardrop shapes. Use a ball tool to gently flatten one end of each teardrop, creating a petal shape. Repeat this process for multiple petals.
Assemble the Orchids
Take three petals and arrange them in a circle to form the orchid flower. Lightly brush water between the petals to help them stick together.
Add Finishing Touches
Dust the edges of the petals with cornstarch to prevent sticking. Optionally, sprinkle edible glitter on top for a sparkling effect.
Let the orchids dry completely before placing them on your cupcakes.
Pro Tips
- Always use cornstarch to prevent fondant from sticking to your hands and work surface. Let the orchids air dry for several hours for best results.
Serving Suggestions
When it comes to showcasing your delicate orchid cupcakes, presentation is key. Consider using tiered cake stands to display them at various heights, which adds visual interest and draws attention to each floral detail. Pair these cupcakes with simple, complementary flavors such as vanilla or lemon to ensure the decorations remain the star of the show. A light, cream cheese frosting can enhance taste without overshadowing the intricate designs.
For a themed event, you can color the orchids’ fondant to match your color scheme. Consider making smaller versions to top mini cupcakes or larger versions for a show-stopping cake centerpiece. These tiny adjustments can create a cohesive look across your dessert table, making your creations feel intentional and well-planned.
Troubleshooting Common Issues
If your fondant is too sticky while working, it signifies that you need more cornstarch. Sprinkle a bit onto your work surface and your hands to prevent the fondant from adhering. On the flip side, if the fondant cracks while rolling or shaping, it's often a sign of being overly dry. Knead in a little vegetable shortening or a drop of water to revive it, but do so incrementally to avoid over-hydrating.
If your petals don’t stick together when assembling, it could be due to insufficient moisture. I recommend lightly brushing with water, but be careful not to use too much, as it can dissolve the fondant. Alternatively, edible glue can be a reliable substitute, ensuring that your petals bond without any unsightly moisture marks.
Questions About Recipes
→ Can I make these orchids in advance?
Yes! You can prepare them a few days in advance. Just store them in an airtight container.
→ What if my fondant is too sticky?
If your fondant is too sticky, knead in a little more cornstarch or powdered sugar until it reaches the right consistency.
→ Can I use royal icing instead of fondant?
Absolutely! However, royal icing requires a different technique than fondant to create the petals.
→ How do I store leftover fondant?
Wrap it tightly in plastic wrap and store it in an airtight container at room temperature.
Delicate Orchids Cupcake Decorations
Created by: The Chefwillfoods Team
Recipe Type: Kids Baking | Easy Sweets
Skill Level: Intermediate
Final Quantity: 12 cupcakes
What You'll Need
For the Orchids
- 1 cup fondant (white)
- Food coloring (optional)
- 1 tablespoon tylose powder
- Cornstarch (for dusting)
- Edible glitter (optional)
How-To Steps
Knead the fondant with tylose powder until it is smooth. If you desire color, divide the fondant and mix in food coloring to achieve the desired hue.
Pinch off small pieces of fondant, rolling them into teardrop shapes. Use a ball tool to gently flatten one end of each teardrop, creating a petal shape. Repeat this process for multiple petals.
Take three petals and arrange them in a circle to form the orchid flower. Lightly brush water between the petals to help them stick together.
Dust the edges of the petals with cornstarch to prevent sticking. Optionally, sprinkle edible glitter on top for a sparkling effect.
Extra Tips
- Always use cornstarch to prevent fondant from sticking to your hands and work surface. Let the orchids air dry for several hours for best results.
Nutritional Breakdown (Per Serving)
- Calories: 120 kcal
- Total Fat: 2g
- Saturated Fat: 1g
- Cholesterol: 0mg
- Sodium: 5mg
- Total Carbohydrates: 27g
- Dietary Fiber: 0g
- Sugars: 25g
- Protein: 0g